|
|
|
 | |
|
Next Built on a PowerBook 1400c |
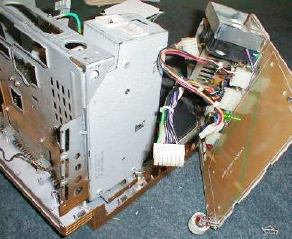
The next step is to remove the monitor and the video board. There are several small phillips head screws attaching the board to the frame. Remove these and then remove the 4 larger screws holdingthe monitor in place.It is not necessary to disconnect the video board from the monitor. Just be careful when removing the two from the frame. 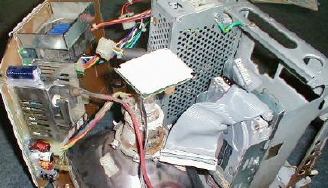 Video board still connected to monitor Third Step Now it is time to remove the hard drive and floppy drive assembly. There are 4 phillips head screws holding this in place. They are behind the drives, between the frame and where the motherboard was located. Two are close together inthe center near the top of the drive mounting bracket and two are spread apart near the bottom of the bracket. You can then reach into the computer and lift the drive assembly and drives out. 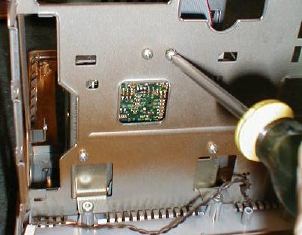 Bottom of computer showing placement of HD/FD mounting screws You should also remove the power supply from the computer. Remove the screw connecting the power supply from the metal frame and then lift the power supply out and set it aside. The last step before painting is to clean the case, remove any extra stickers, smudges, etc. After cleaning the case, use the fine sandpaper to lightly sand the case. This is to help the paint adhere to the case. After sanding wipe the case down with a slightly damp rag to remove any dust. One more thing before you start painting. Use a straightened large paperclip to remove the Apple logo and mask off any areas, (SE/30 label, info on the back of the case, etc.), that you do not want to paint over. NOW you are ready to paint your Mac! |
![]()